

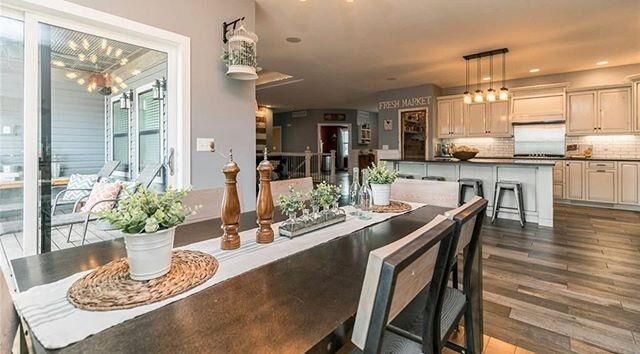
Simple Spring Dining Room
It’s beginning to warm up here, and that means it’s time to bust out the spring decor! I am trying to follow a more simple style this year (less to dust!) and I am really enjoying it.
Speaking of things I am really enjoying, I found a small tray with little glass bottles on Target’s website lately, for a very affordable price (around $23) and I see it is still available online. I decided to add it to my dining room table, here is how I styled it….
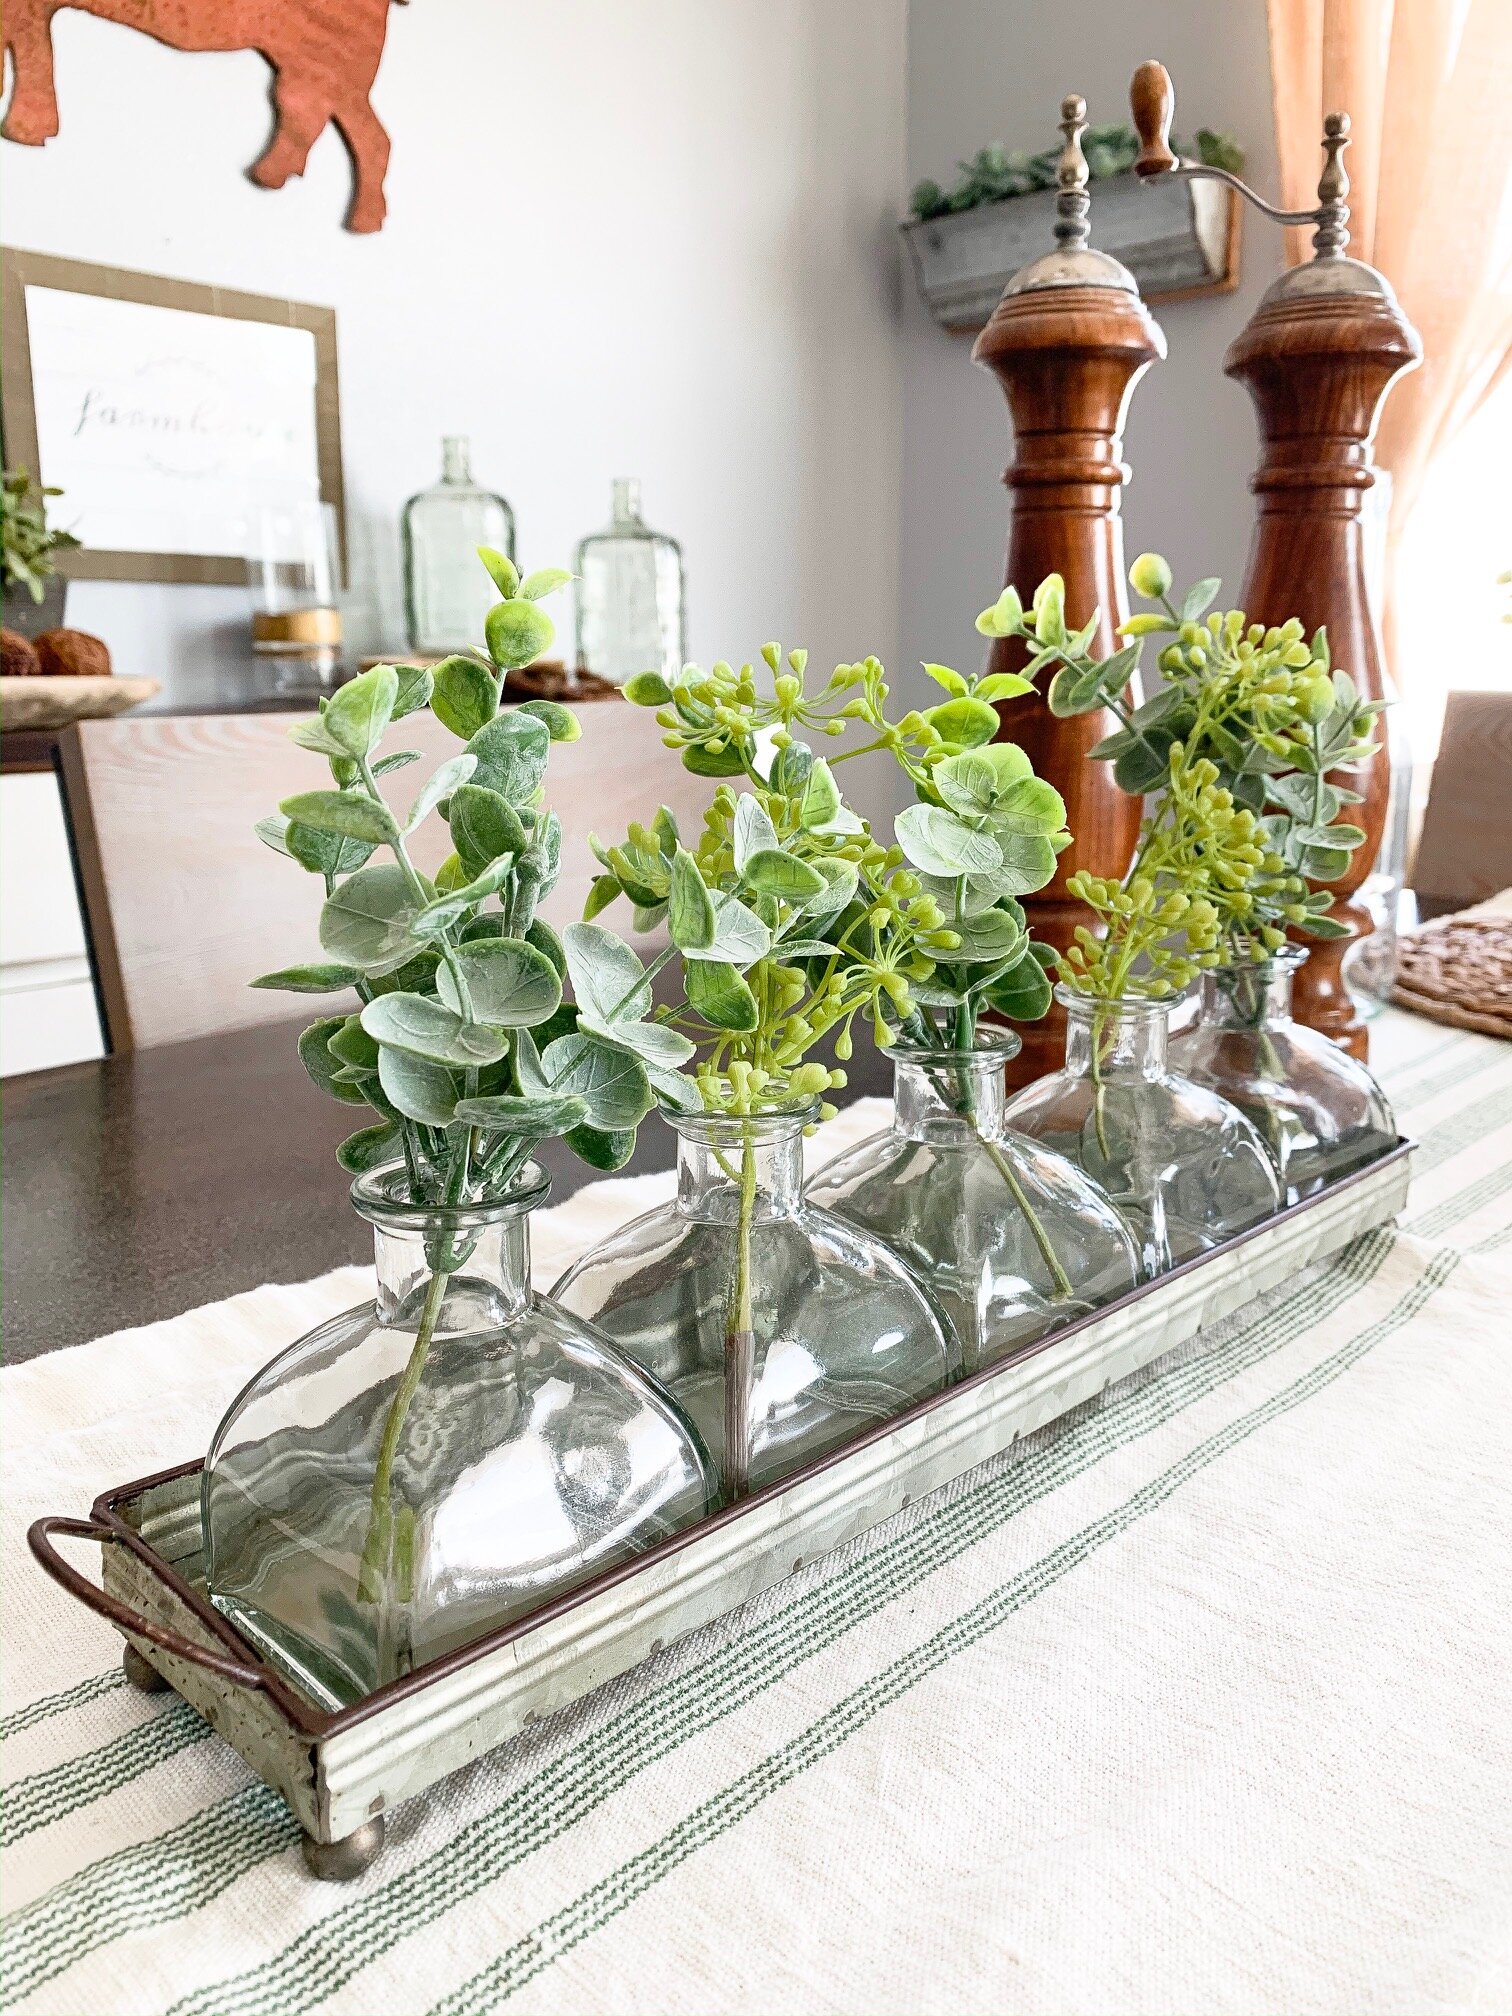
As for the greenery that I used, I have a bin of random floral that I have collected over the years and I just cut some of that up and put it into the glass bottles. I tend to like the looks of faux greenery that isn’t ‘shiny’ or plastic looking, and of course that is always the type that costs the most, so buying off season/clearance and keeping them in a tub is a way to offset the price.
Another really good deal that I found at Target in their spring floral area, are their small faux eucalyptus plants. They are surprisingly ‘dense’ and nice looking for the amazing low price of $5. My target still has them available, and I will be snatching up a few more and putting them all over my house!
Here is a photo of how I used these plants on my table (they come in a nice white planter, and I just set them inside a larger white pot that I already had).

Now for a shot of the whole table, so you can see it all together…

And there you have it, my simple and festive dining room! I hope this post brought you some inspiration for your own home, and as always thank you for stopping by the blog today! We really appreciate it! We will chat again soon!
Cheers!
-Rachael
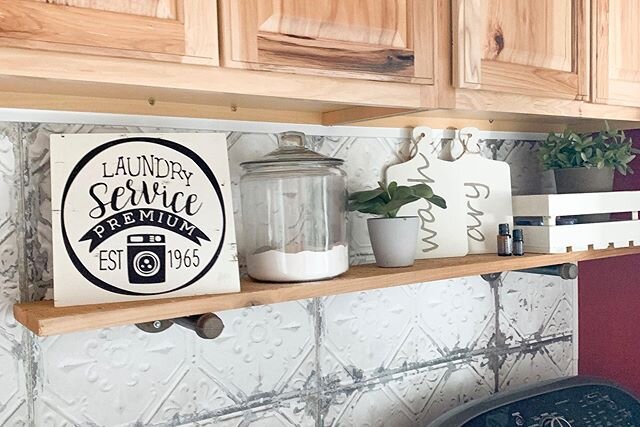
Laundry Room Makeover
I am always looking for inexpensive ways to update and/or decorate our home, and my laundry room was recently at the top of my list of spaces that needed serious help. I had seen several designers recently posting about using wallpaper to update a space, and my first reaction was not a positive one. I mean, wallpaper?!? Who has time for that??
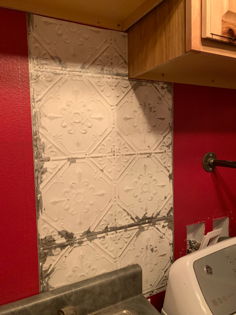
Well as it turns out, I had time for it, and so do you! Wallpaper has come SUCH a long way from the days where I remembered my grandparents mixing paste and matching patterns, only to have it dry and shrink just enough that it no longer lined up perfectly. I was curious how this “new” version worked, so I ordered a roll from Target’s website, which has dozens of options.
Today’s version of wallpaper has no mess, simply peel and stick. Make a mistake and need to remove it? Just peel it off the wall, no damage to the paint/wall, and you can re-use the piece! This feature in particular makes a wallpaper project budget friendly, I did this entire laundry room makeover with only one roll, which was $30. Don’t worry about matching patterns either, the print I chose has a tiny pattern line on it so you can easily tell where the next piece should line up.
So I went for it and ordered the wallpaper….
Before I show you how it turned out, let’s take a look at some ‘before’ photos!


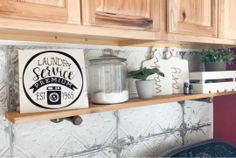
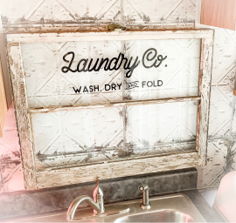
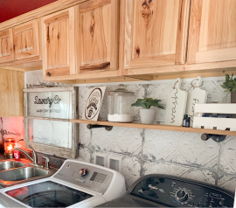
This laundry room functioned just fine how it originally was, but I wanted a space that was more inviting and had a ‘fresh’ look. I first shopped the garage for some shelving materials, then picked up a vintage window for the space above the sink, and finally picked out the wallpaper that would tie it all together Somehow, I roped Adam into helping me.
Neither one of us had ever worked with wallpaper, and thus we had no idea how to install it. I envisioned unrolling it and sticking it to the wall (why make it more difficult than it needs to be, am i right?), however Adam had other ideas.
He approached the situation as thought it were flooring, and found the center of the wall and the center of the wallpaper pattern and started there. As a result, the first piece took about 45 min to place, but the rest of it went much faster.
After the wallpaper was applied, we placed a small white trim around the top edges to give it more of a polished look. Then all that was left was to mount the shelf and hang the window, and suddenly the laundry room had been transformed! Here are a couple photos…


This budget friendly update has made quite a difference, and I am really happy how it turned out. This was a learning experience, but it really was quite easy, so if you are looking to freshen up a space consider using wallpaper!
That’s all I have for today, I am headed back outside to enjoy this second Summer that Iowa has given us this week! I will be back soon with our latest outdoor client project, as soon as I load and edit the photos :)
As always, thank you for stopping by the blog today! We really appreciate it!
-Rachael
The Final Summer Porch Refresh!
If you have been following along you might be aware that sweet corn season officially started this week here in Iowa, and I might be just a teeny bit excited about that! In fact, I had to incorporate the first delivery of corn into my final Summer porch refresh of the year. That’s correct, the next time I redo this space it will be with pumpkins!
But for now, I had to take down the 4th of July decor and I wanted to incorporate a few farming pieces to set up for the future harvest season. As a collector of all things random and old, I happened to have everything I needed stored in the garage (which has kind of unintentionally become my decor locker, just don’t tell Adam). This John Deere seed planter from an old tractor is a great example…

The fresh ears of corn in this photo are from our local CSA/farm share program that is delivered weekly throughout the spring and summer. For more information about farm shares, you can see my full post here.
Here are a couple more photos of this newly refreshed space!
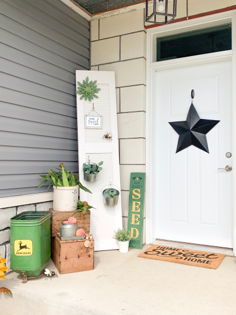
For the other side of the door I snagged some of the decorative grass from my front landscaping that is currently out of control, and stuffed it into an old rusty milk can that i picked up at a garage sale a couple years back. The black metal ‘hello’ sign will stay for now, but I might take it down for the winter months, as it gets pretty cold here and I don’t want it damaged or warped in any way.
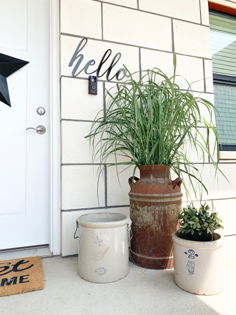
Here’s a front shot of the whole front porch, which is one of my more favorite area’s to decorate at my home. Now, if only I can light a fire under Adam and have him replace the construction door that’s been there for 4 years next month! It’s the little things….

That’s all I have for you today, thank you for stopping by the blog and I hope I have been able to inspire you on your own decorating adventure! As always, feel free to share your projects and questions either here or over on Instagram.
Happy Summer!
Rachael
Spring Dining Room Decor
It’s March, and I am determined it’s time to decorate for spring, regardless of the fact it remains very cold here in Iowa. Today I want to share with you my quick and easy dining room decor that I refreshed for the new season.
This is quite possibly the last time I decorate this table, as it is on the project list to be sold and replaced with a barn wood farm table, much like this one pictured below (photo from a client’s home).

Hopefully by mid summer we will have the table built and replaced, but as always it is hard to find time to do things for yourself. At least we won’t have snow removal getting in the way of our projects by then!
Well I could talk for hours about plans for my dining room, but let’s get back to the current task at hand….decorating for spring! Traditionally, I have never done a whole lot for spring, and as a result I only have one tote designated to spring decor (I have like 8 for Christmas!). Regardless, I dug that tote out a few days ago and got to it.

I picked up these pastel eggs from Target, either last year or the year before, and I have really enjoyed them. They add just a hint of color and are so versatile to use. And since I don’t plan on changing anything up before Easter, they are going to serve dual purpose as the Easter decor!

Here is a closeup of the table, which I kept very simple, and all of these items I had on hand except for the small glass plant mister which was at the Target dollar spot, score! If we zoom out a bit you can see the rest of my dining room below.

My buffet and large rusty metal pig are permanent fixtures of the dining room, and I change up the buffet decor for the different seasons. As you can see I used some faux greens and DIY candlesticks (if you missed that tutorial click here). Also, I have had some eucalyptus and faux flowers in the window boxes for a couple months now, but I will most likely leave those as is until we are closer to summer.
And there you have it, my simple refresh of my dining room for spring. I would love to refresh my front porch as well, but my winter decor is currently frozen to the concrete so that will have to wait for another day and another post…hopefully sometime soon!
Well I am off to tackle some spring cleaning, I must harness this motivation while it lasts! Thanks for stopping by the blog today, see you soon!

The Kitchen Reveal You Don't Want To Miss!
Sometimes there are home improvement projects that linger, for years. This would be one of those projects. Our kitchen was 95% finished for the last two years, all but for some 6 or 8 back splash tiles and decor. Well, since this winter is approximately 15 months long, we had time to finally get a few things done around here and this project was one of them!
A little background info:
the home we currently live in was designed on a piece of notebook paper by my husband. We eventually had to have an architect develop the house plans off of our drawing (because let’s face it, we know nothing about truss systems for roof structures) but the floor plan stayed the same. Now we had previously built additions to homes, and remodeled existing structures, but building the entire home from scratch was a new endeavor. Oh, and did I mention we had never designed a kitchen… (yikes!).
So off we went with our notebook paper drawing to meet a local cabinet maker and have him help us come up with something. He told us what worked logistically for wiring and plumbing, and showed us some basic layouts he had in production. I knew I wanted something different and unique and by the time we left our first meeting I am pretty certain he thought I was nuts.
Fast forward to that next summer, and we were laying tile and painting the walls in preparation for the cabinet maker to bring and assemble the cabinets. I don’t have many pictures from this point in time (maybe because we were literally building our home during the night and working during the day), but this photo below shows you the basic outline of our cabinet system (excuse the contractor lighting and pizza box).

The next step was to add counter tops and appliances, which then made this kitchen functional. We were on a time crunch, so finishing touches and decorating took the back burner. We just needed our kitchen to pass the final building inspection and we could worry about the rest later.
Originally, I was interested in concrete counter tops but my husband talked me out of it. We cook A LOT at our house, and he was afraid that we needed a stronger material that could take a beating without showing any signs of wear. I am happy to report that after three years of constant use, these quartz counter tops have held up perfectly and have zero imperfections.
We did add a stainless steel back splash behind the stove area pretty early on, and then gradually finished the rest of that wall with subway tile, as you can see pictured below.
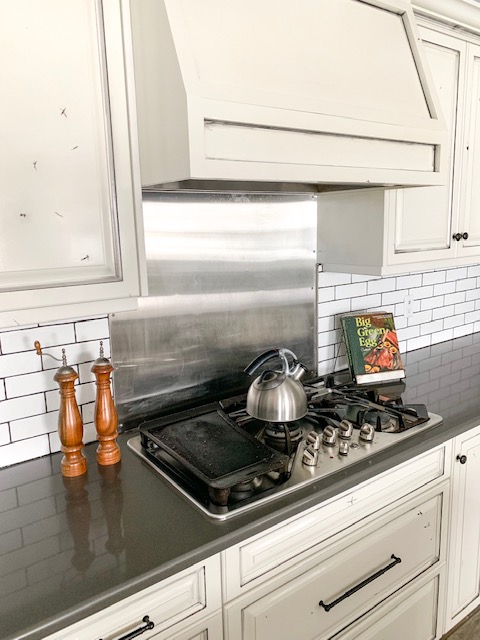
One of the first comments people usually make when they see our kitchen for the first time is that our cabinets look ‘beat up’. Well, I think this is where our custom cabinet maker thought I was nuts, but I wasn’t going to budge on the distressed look. The material is knotty alder, and we chose all of the wood that had the greatest amount of natural knots and ‘imperfections’. Then, combined with black glaze and iron knobs and pulls, this kitchen has the appearance that the cabinets are older or re-purposed, when in fact they are brand new. I know this is a unique look, and it’s not for everyone, but it really came together in the end and I couldn’t be happier with how it turned out.
Ok, fast forward a couple of years to present time, and the last of the subway tile was installed over the kitchen sink. During the notebook paper design phase, I had pictured a window for this space but it was not feasible since the garage was on the other side of the wall. I still decided to put a window in this space, but just had to be a bit more creative.
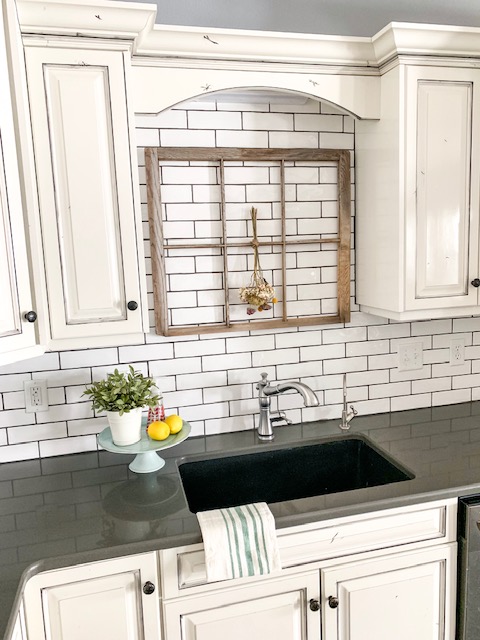
I found an old farmhouse window at a salvage barn for $5, and I immediately knew it would work for this space. All of the glass was removed, which was perfect since it would make cleaning a breeze. This window frame is very light, and thus I was able to install it easily with command strips. Plus, I didn’t really want to drill into the fresh tile! (yikes!) And while I love our sink, I would have preferred a copper farm sink but that just wasn’t in the budget for this house (maybe next time!).
Here are a couple more photos/angles of our kitchen:


Well I could go on and on about this kitchen, it really is the focal part of our home and I am so excited that it is finished. This was a huge lingering project that I can finally cross off of our list, all thanks to our epic long winter this year. If you have any other questions about the materials or process, feel free to leave a comment here or catch me on Instagram. As always, thanks for stopping by the blog today! We really appreciate your support!

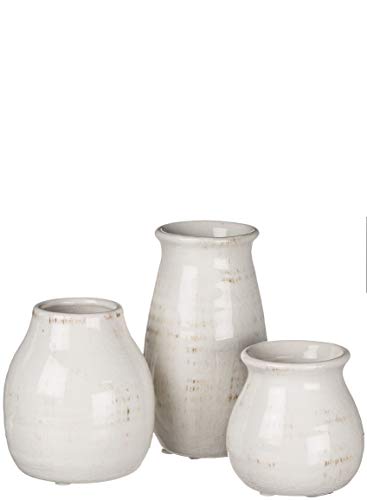
Spring Farmhouse Decor Items on Amazon (Budget Friendly!)
Hi there!
I know it’s wishful thinking for most of us that spring will be here soon, but that doesn’t stop me from wanting to de-clutter, disinfect, and decorate with bright colors. If you have been following for a while now, you know I love all things budget friendly and that includes decor. I frequently make my own decorations, but there are some times when a minor purchase can really make a difference to a space, and today I have brought you my top picks for budget friendly spring farmhouse decor items from Amazon.
*Note: This post contains affiliate links, for my full disclosure please click here.
Quick and Easy Updates
If you are like me, you might not have a ton of time to refresh your home for the next season, which is why I love simple pillow decor. Just bust these out of storage and pop them on the couch! Done!

Incorporate the Outdoors
Spring is a great time to start bringing your indoor and outdoor spaces together. This can easily be accomplished by decorating your front flower beds or starting your garden early indoors. Depending on your weather patterns, this time of year can be busy with planting. For us in the upper Midwest, we have a while to go yet before we can get our hands dirty outside so until then we bring the outdoors in!

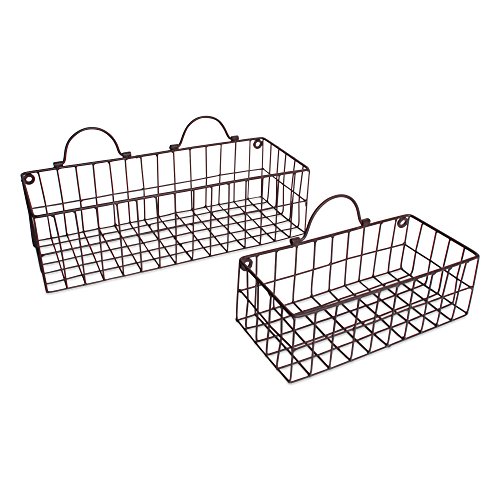
Prep the Kitchen
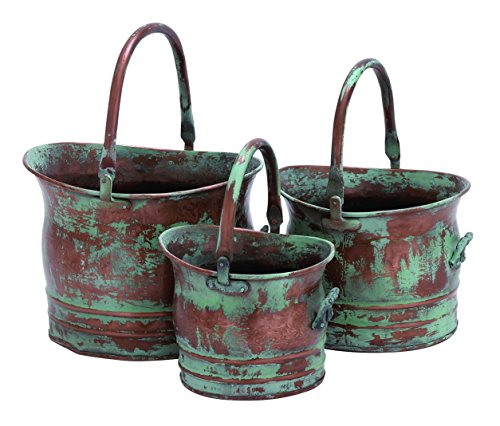
With all the fresh food that will be coming in from the garden, I like to take time to reorganize the pantry. These hanging baskets will be perfect for fresh produce (we are going to try and do a ton of onions this year)!

Everyday Essentials
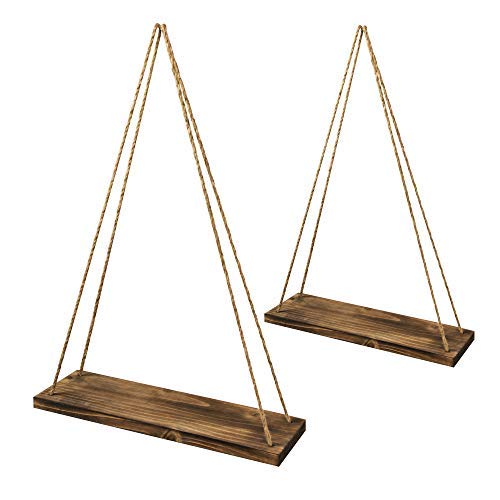
These last few items can be versatile for many seasons, making them worth the time and effort of installation!


Don’t forget to Pin this post for the future! Simply hover over the image below, and the Pinterest icon will show up, easy!


Spring Faux Greenery Guide
Hi all! I know you might read the title of this post and think to yourself it’s January and too early to decorate for spring, and while I certainly agree, I do like to add a pop of greenery to my winter decor to keep things fresh. Iowa has a habit of being brown, with the exception of snow, for months on end and I personally prefer a hint of green to keep me plugging away until spring!
First, let’s discuss where I like to shop for faux greenery.
I get a lot of questions about where I find my stems and it varies by season. For example, I like to shop at Hobby Lobby for fall and winter stems due to their extensive selection and great prices on seasonal items. For spring or year round items I prefer Target or Amazon, due to their rock bottom clearance prices. Target usually has more of the style of faux greenery I prefer, and there is the satisfaction of seeing it before you purchase, however Amazon reviews can often times answer any questions you might have prior to buying and it helps they have a hassle free return policy on most items.
Next, lets take a look at the types of faux greenery available.
Below you can see a couple different examples of greenery currently in my home. The left photo shows more of a softer look with muted tones and a ‘fuzzy’ texture. I prefer this type of greenery for any stand alone plant that I decorate with, as it matches the softer tones throughout the rest of my home.
The photo on the right shows a mixture of large matte eucalyptus leaves with a smaller, more ‘shiny’ plant. When creating a display with multiple plants, I prefer to use different textures so the individuals stand out.

Softer, ‘fuzzier’ look

Matte vs Shiny
Here is another example of how the matte, softer looking plants work well with the decor already in my home.

This greenery is from Target. Book sets available here
Here are examples of mixed textures with multiple plants in flower boxes that I have in my dining room. I did add a hint of color to these displays, and I plan to continue to add to them later on in the season. I like how each type of plant stands out from the bunch.


If you are looking for a few greens to get started with, I rounded up a couple options below from Amazon. You just can’t beat the bulk pricing and quantities!
Note: These are affiliate links, and you can read my full disclosure here.


Well, that’s all for today! I hope this post was able to provide some inspiration for your own decorating!

Hello January!
Hello! We made it through the holiday season at my house, and I don’t know about you but I’m ready for all of the clutter to be packed up. I still have some simple flocked trees that I am decorating with, but all of the holiday decor is back in storage. Christmas is my favorite time of year, but by the end of the season I always feel overwhelmed with glitter, gift wrap, and general disorder.
With all of that in mind, I thought I would share my simple table design for the remainder of winter. Iowa has had some chilly temperatures but no real snow since November, so everything outdoors is gloomy and brown.

My initial thoughts when I was digging through my decor and putting this together was that I needed something simple and with a hint of color. As you can see, I chose mostly neutral colors and added a pop of greenery to remind us that spring will be here (hopefully) soon.
I have several of these book sets all over my house, each telling a different ‘story’. I am working on setting up a web page where these can be ordered but for now if you would like a set just contact me. I put this tray together and then set it on top of a simple beige and green table runner that I had in my spring decor collection. I was in the mood for simple, and kept it at that.
I hope you are all staying warm this January, wherever you are located! As always, you can catch us on Instagram or Pinterest for daily decorating ideas and I will be back soon with some fun DIY projects to keep you busy during these long winter months! Cheers!

My Entryway Sawhorse Table
Hi Friends! I’m slowly getting my home ready to go for Christmas, and I love decorating this fun sawhorse table in my entryway each and every season. My husband made it several years ago, and it continues to be a focal point in our home. I thought I would share what I did with it this year so you can get some ideas or inspiration for your own home!
I had these random steel buckets from a thrift store, a DIY Christmas garland that I made, and some jingle bells and other random items that I wanted to incorporate.

I love this old spool and jingle bells!

DIY Fabric Garland, click for instructions!
Here is how it all turned out, I love all of the different textures (metal, fabric, etc) along with the black and white and plaid holiday colors. Can you tell I am loving buffalo check this year??

My Saw Horse Entryway Table
Repurposing old items is one of my favorite decorating hacks! These hooks that hold up the lanterns on either side of the table are from an old carriage house/barn that had to be torn down due to storm damage. Just think of all of the horse and carriage equipment that hung on these hooks for decades, now they are continuing their work in my home! (I’m a history nerd, I know!)
Well that is all I have for you for now, stay tuned for the rest of my décor in my personal home as I get it completed!
XO,
Rachael
PS. I put together a simple (budget friendly!) guide to adding buffalo check to your home’s décor, and if you are stumped or need ideas feel free to check it out by clicking here!
(Note: The above link contains affiliate links and you can read my full disclosure here)