Hello January!
Hello! We made it through the holiday season at my house, and I don’t know about you but I’m ready for all of the clutter to be packed up. I still have some simple flocked trees that I am decorating with, but all of the holiday decor is back in storage. Christmas is my favorite time of year, but by the end of the season I always feel overwhelmed with glitter, gift wrap, and general disorder.
With all of that in mind, I thought I would share my simple table design for the remainder of winter. Iowa has had some chilly temperatures but no real snow since November, so everything outdoors is gloomy and brown.

My initial thoughts when I was digging through my decor and putting this together was that I needed something simple and with a hint of color. As you can see, I chose mostly neutral colors and added a pop of greenery to remind us that spring will be here (hopefully) soon.
I have several of these book sets all over my house, each telling a different ‘story’. I am working on setting up a web page where these can be ordered but for now if you would like a set just contact me. I put this tray together and then set it on top of a simple beige and green table runner that I had in my spring decor collection. I was in the mood for simple, and kept it at that.
I hope you are all staying warm this January, wherever you are located! As always, you can catch us on Instagram or Pinterest for daily decorating ideas and I will be back soon with some fun DIY projects to keep you busy during these long winter months! Cheers!

The Epic Barn Beam Bed Frame!
Hi all! We are in the home stretch leading up to Christmas and many of you are probably already on break for the holidays (this season seemed like it flew by faster than previous years). I have one final post for you before we transition into full Christmas mode at my house, which will consist of a few days computer-free to enjoy this time with family. So if you are sitting in an airport waiting to travel to your holiday gathering, or maybe need a 5 minute ‘break’ from all things Christmas, I have just the post for you!
Recently, we finished up a client project that turned out to be the biggest piece of furniture we have ever created, thus the title of this post. This bed frame required long hours of prep, assembly, take down, haul to its final location, and reassembly, but as you will see it was well worth it and turned out stunning!
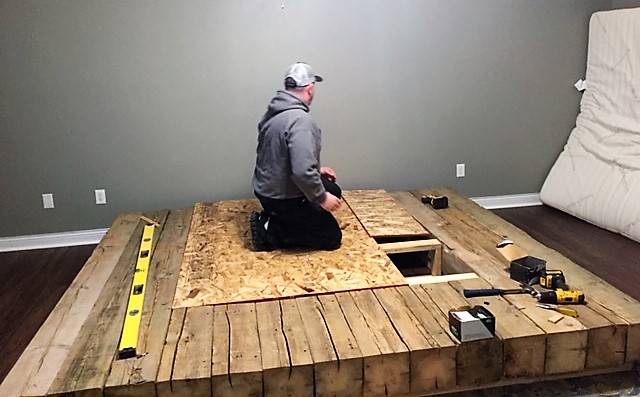
The materials for this project included authentic reclaimed barn beams and these were SOLID 8x8 beams, which made them very heavy.
Prior to use, the beams had to be cut, sanded and assembled at our shop to ensure they all fit together properly and weren’t warped by the last 100 years of extreme temperatures of Midwest weather. a simple frame was assembled to keep the beams up off the floor in the client’s room.
Next, each beam was secured in place. To eliminate some of the weight of this piece, an alternate framing technique was used to comply with floor joist specifications and it was completely covered by the mattress and otherwise not visible once assembled.


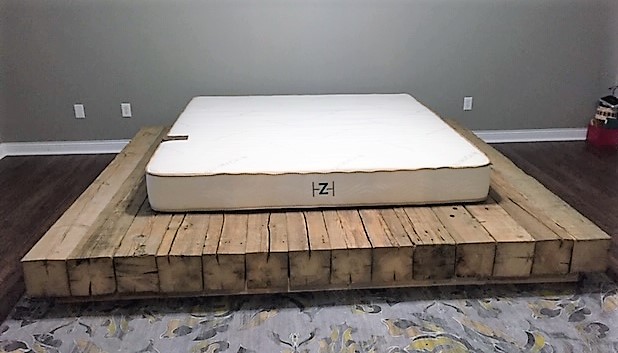
Here the frame is being finished up and mattress added.
To show you just how big this bed frame is, the mattress pictured is king size!
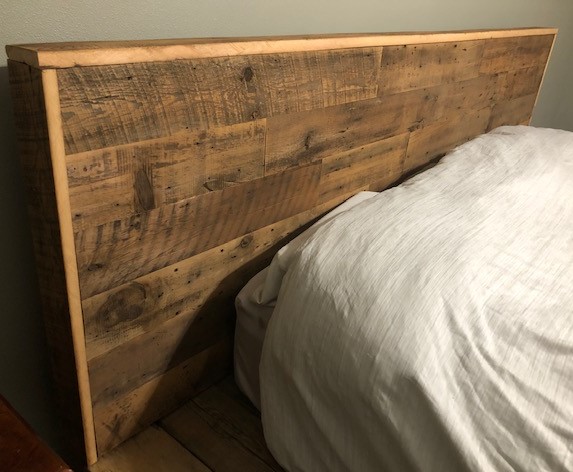
Pictured below are some up close photos of the wood details on the headboard and beams, each of which are unique. There is just something about the look of authentic barn wood that cannot be recreated with other materials.

The finished project photos!

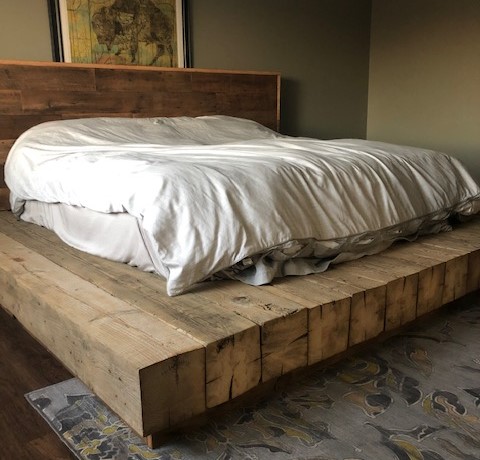
This bed frame turned out truly stunning!
I absolutely love how it all came together. A sincere thank you to the client who chose us to make this item for her!

The Friendship Fireplace Project!
Hey all, one week until Christmas Eve! Are you ready? (It’s OK, I’m not either!) I’m not too stressed about it either, there’s plenty of time left for that! All of that aside, I am excited to share with you a client project we recently finished up called ‘The Friendship Fireplace’. The street address for this home contains the word ‘Friendship’, thus that is how the project name was developed. We do a number of fireplace/mantel projects and have to keep them straight with unique titles!
The fireplace is often the focal point of the living room as well as the backdrop for family photos, and this homeowner wanted a total remodel of this space to bring it out of the 1970’s. To do that, we first had to start with a clean slate!

Aside from the fireplace itself, there was not any part of the original design that was worth keeping…it all had to go.
And as you can see we made a huge mess, but it was worth it!
Progress photos after some new framing, insulation, and cement wall board.


We needed to redefine this space, and the easiest way to accomplish that was to add a new texture or wall surface. The homeowner chose rough sawn weathered shiplap, which is pictured below. It’s a gorgeous light grey, and really makes this space ‘pop’!

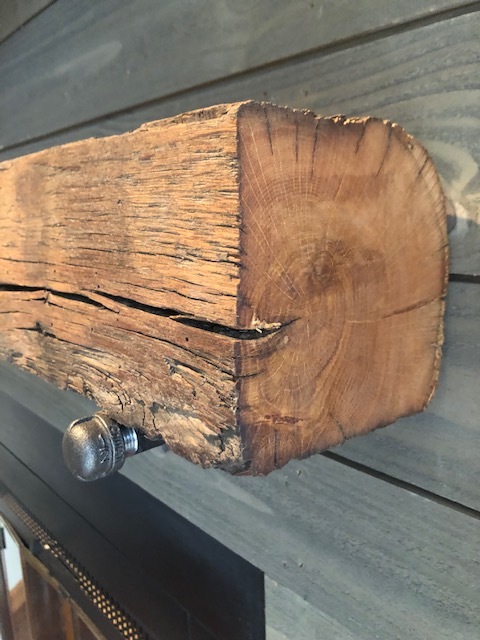
These barn beam mantels are always my personal favorite. Every single one is unique, bringing a different century-old story into each home. This one was mounted with simple gas pipe wall plates and fittings.


And here’s a full length view, complete with fresh tile at the base of the new wall. This family will have a fresh new space to take all of their family photos and the mantel will surely be a talking point with guests for years to come!
We really appreciate the homeowner choosing our business to complete her fireplace remodel!
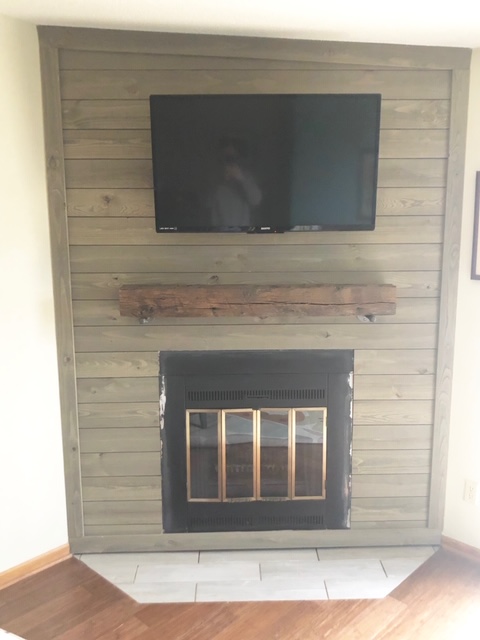
The fireplace insert remains in original condition, as the homeowner has plans to resurface that herself
And some bonus mantel pictures, because I can’t help myself!


My (No-Cost) Holiday Front Porch!
Last week I wrapped up my decorating for the year by completing my front porch, and it was a challenge! If you follow me on Instagram (@aps_design) you already know that I posted the whole process on stories that day, attempting to do the entire porch with items I already had at home, no purchases!
This was a personal challenge I came up with because I know I have a ton of items at home that I should be creative with and use for decorating, but I usually forget to do that and just purchase what I need instead. But, in the spirit of budget friendly, I went with a no-cost front porch this year! Now I will admit, I have a large collection of random items that helped make this task possible, but I did have to get creative in using them and some of these methods could inspire you as well!
Lets get to it!
I worked on the right side of the porch first, collecting items and putting them in a wagon that I found in my garage. I had made some ‘presents’ out of blocks of wood earlier this season and decided they would go well together in the wagon. The crock that is also in the wagon could probably use some greenery but in the spirit of not buying anything for this porch decor, it remains empty.
The large rusted milk jug is a staple piece for my front steps, so it always stays out there in some capacity. This season I gave it some height by positioning it on top of an overturned wooden apple box.
I piled the wood slices up in front of the wagon to add more of a woodsy/rustic/tree farm feel to the picture.

The left side of my porch was a bit more challenging, as I did not have any Christmas lights on green wire, but in the evening hours when the tree is lit it’s not as noticeable. I simply put the tree in an old wash bin and stacked some wood slices in front of it.
During my scavenger hunt in the garage, I found this beautiful vintage sled and half barn door that I had previously forgotten about. I grabbed a little greenery and tied it to the sled. Ideally, I would find some old ice skates to pair with the sled, if I wasn’t doing a no-cost challenge!


Here’s the final look!
Again, I would have done things a little bit differently if I wasn’t doing this little personal challenge of not purchasing anything for the front porch, but this did force me to look through things I already had and be creative in using them. I hope this can provide some inspiration with your own budget friendly decorating! Merry Christmas!

The 'Great Outdoors' Project
Winter has arrived in full force here in the Midwest, and that means all outdoor projects have to be wrapped up. If Iowa wasn’t such an extreme weather state maybe we could work outside into December, but once the air hoses and tools start to freeze/not function properly, we call it quits for the (outdoor) season.
We did get to finish up one last project for the year, one which completes a series of outdoor renovations at a particular client’s home. This home is situated next to a golf course and has stunning views of the surrounding landscape, however the grading of the back yard and limited outdoor space made enjoying this little slice of heaven challenging.
The projects at this location included a new and expanded deck, new retaining wall and extensive dirt work/grading, as well as a complete overhaul of an existing screened in area to make it weather proof and fully functional addition to their home. All of these renovations were completed by adam and aps construction.
The Raised Deck
Original Deck Photos
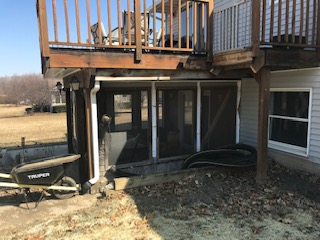
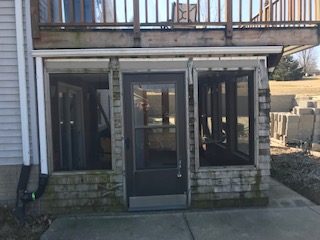
As you can see, this deck was functional but small, and showed wear from the elements over the years. In the last picture, you can see the screened in area in its ‘before’ state as well.
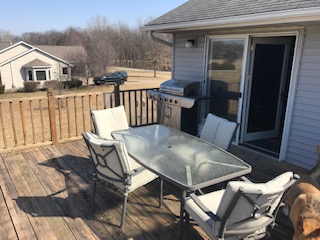
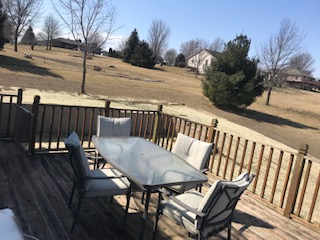
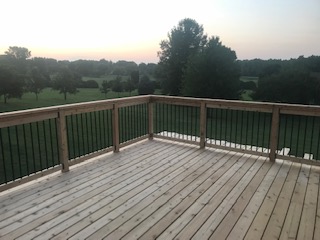
New deck photos
This project was completed with cedar boards and aluminum spindles, check out that view!


Retaining Wall and Yard Grading
This part of the project was very important, as it produced level yard space that could then be used for additional structures, fire pit, you name it! Here are a few before/after shots.


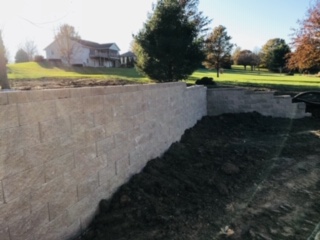
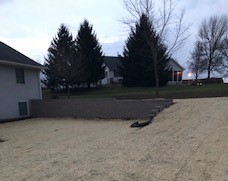
As you can see, not much of this part of the yard was usable due to the terrain, but that is no longer a problem!
Screened in porch overhaul
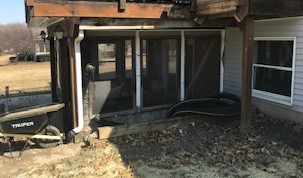
original photos
The final leg of this outdoor project was to update the existing screened in porch/patio area underneath the raised deck. this room was not being used to its full potential, since it was at the mercy of the harsh Iowa weather.

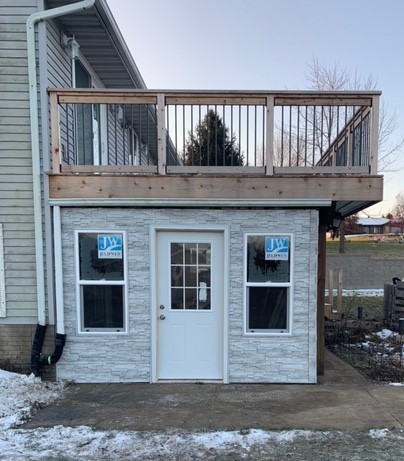
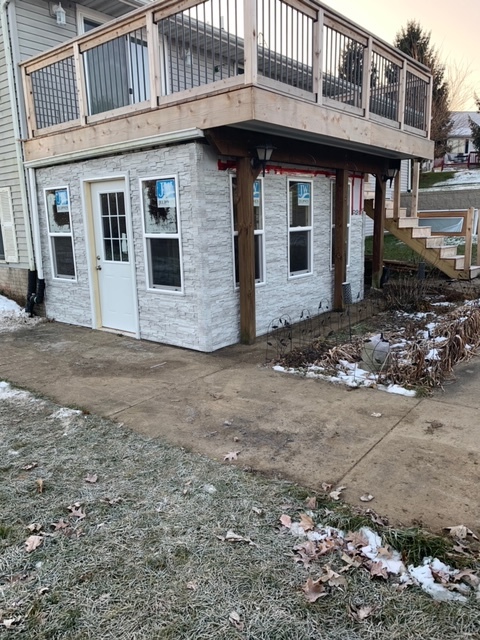
New and improved four seasons room
With new framing, insulation, windows, doors, and stacked stone vinyl siding, this room is now ready for the elements and can be used to enjoy the golf course views and Iowa sunsets year round.
The completion of this project brings our time outside for 2018 to a close, but that doesn’t mean our schedule slows down. we simply transition to more wood working projects, furniture making, and various other items that can be completed indoors. And of course, snow removal, because this is iowa after all!
Wrap It Up! An Easy Christmas Wrapping Guide
Hey friends! It’s officially December! the purchased gifts have started rolling in from all those black Friday sales and they are just waiting to be wrapped!
How do you tackle this final stage?
Maybe you are a seasoned professional and have the picture perfect gifts under the tree….?
or
Maybe you put everything in a gift bag 10 minutes before they are exchanged…?
OR
Maybe you wish to have some cute & matching wrapped gifts but don't know where to start and also don't want to tack on a bunch of expense making it happen…?
Well, I am here today to give you some simple and inexpensive solutions to this gift wrapping dilemma…
Just follow these easy steps!
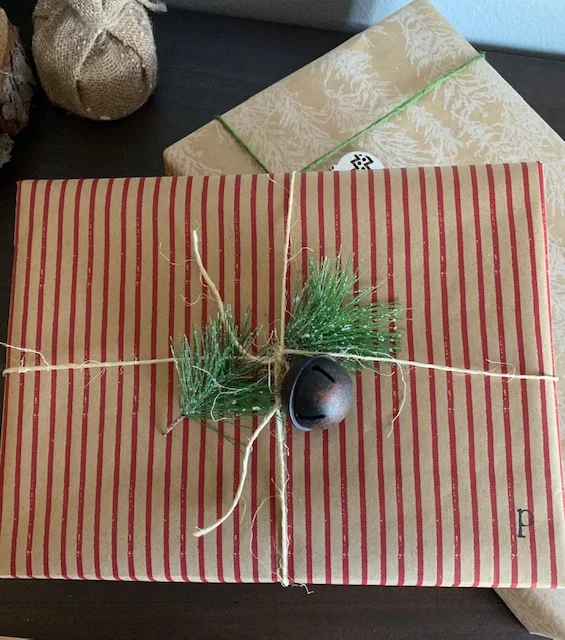
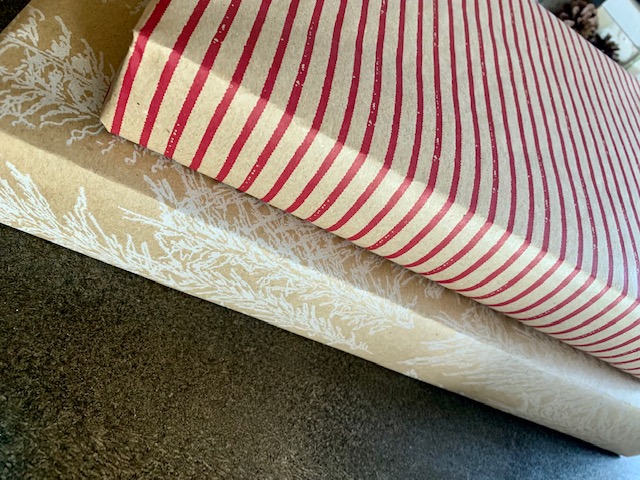
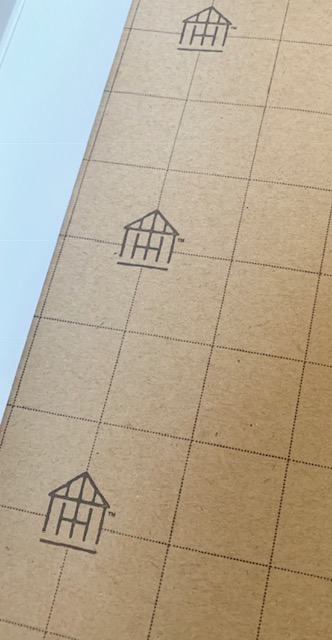
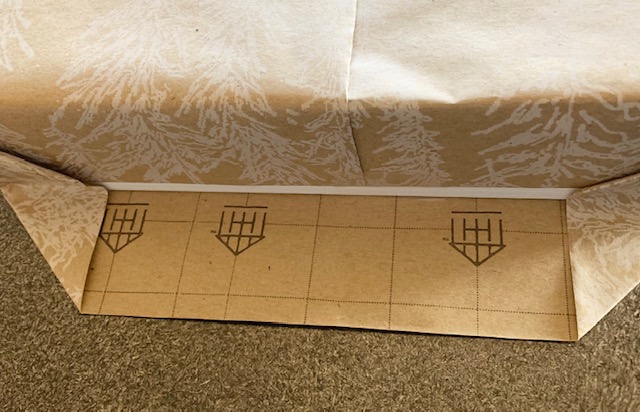
Choose at least two different papers that coordinate well together. I always go with a simple brown paper and then add in something else with a little color. This year I accented with red, which i normally stay away from during holiday decorating but i gave it a shot! I really like lined paper, as it helps eliminate waste. These are from the hearth and hand collection at target.
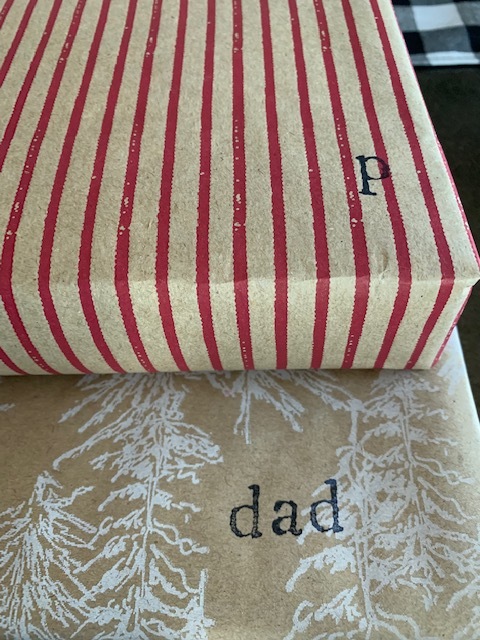
2. I like to use a stamp to address the gifts, either with first initial or full name, this cuts down on tag costs and also looks a bit more ‘homemade’. If you prefer tags, these on the right are some cute and inexpensive choices from the target dollar spot.

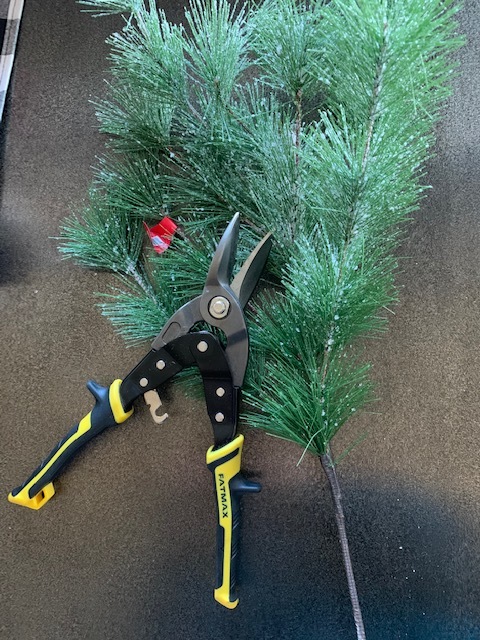
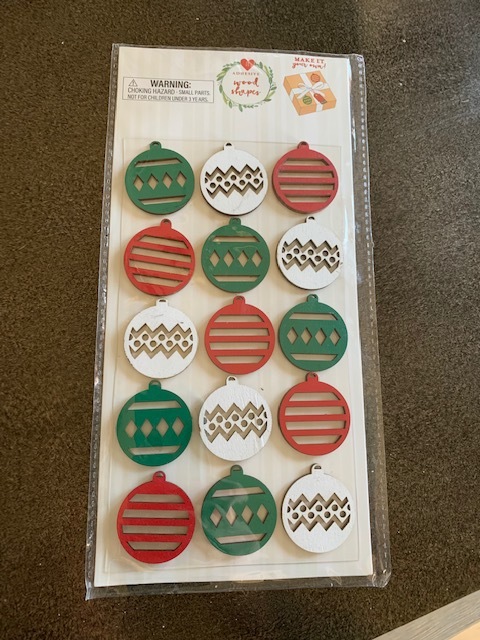
3. Next, select your gift toppers. This year i gathered up some wooden stickers from the target dollar spot (pictured below) and faux greenery. .